The Best Tips to Grow Chives in Your Garden
If you’ve never grown an herb before and you’re nervous about killing it (fair, we’ve all been there), chives are your gateway drug. This perennial comes back every single year with almost zero effort from you, and it somehow makes eggs, baked potatoes, and dip taste like you actually know what you’re doing in the kitchen.
Good news: growing chives is refreshingly uncomplicated, especially compared to some of the divas in my garden (looking at you, lavender). Let’s walk through picking the right variety, getting it in the ground, and using it in ways that go way beyond “garnish for baked potato.” Ready? Let’s dig in.
This post may contain affiliate links, which means I may earn a small commission at no extra cost to you. As an Amazon Associate, I earn from qualifying purchases. I only recommend things I genuinely use and love, and I truly appreciate you supporting my small business. 💚 See my disclosure page for details.
I am not a doctor or medical professional. The content on this site is for informational purposes only and should not be taken as medical advice. Always consult a healthcare provider before making any health-related decisions. Read the medical disclaimer here.
Understanding Chives
Chives are perennial members of the onion family, meaning they regrow year after year, providing a constant supply of fresh herbs for your kitchen. Learn more about perennial herbs by reading my blog post – Top 10 Herbs that are Perennials: Cultivate a Lasting Herb Garden
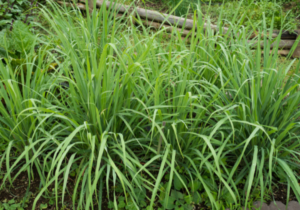
Chives belong to the allium family, which includes onions, garlic, and leeks. They are known for their delicate onion-like flavor, making them a popular choice for garnishing dishes or adding a mild spice to recipes. These slender green herbs are an ideal addition to any garden due to their ease of growth and versatility in the kitchen. Whether you’re sprinkling them over a baked potato or incorporating them into a homemade salad dressing, chives offer a burst of freshness that enhances any meal.
Chives’ culinary uses aren’t limited to savory dishes alone. With their subtle onion flavor and vibrant color, chive blossoms can be used to create infused vinegars or as an edible garnish, adding visual appeal to your dishes. With their myriad uses and hardy nature, it’s no wonder chives are a favorite among gardeners and home cooks alike.
Chives are not just about taste; they pack a punch in terms of health benefits. Classified as a superfood, they are nutrient-dense, containing significant amounts of vitamin C for immunity and vitamin K for blood clotting and bone health. Additionally, they are high in dietary fiber, aiding in digestion. The organosulfur compounds in chives possess anti-cancer properties and bioactive elements like allicin that improve heart health. Moreover, chives are loaded with antioxidants that demonstrate powerful anti-inflammatory properties, helping to thwart uncontrolled tumor growth.
These health benefits make chives a fantastic addition not only for their flavor but also for their contribution to a healthy diet. When you plant chives, you’re growing more than just an herb; you’re cultivating a powerhouse of nutrients and beneficial compounds.
Between the flavor and the health perks, chives are basically doing you a favor just by existing in your yard. Let’s get you growing some.
Choosing the Right Chives
First things first: not all chives are created equal, and picking the right one depends on what you’re actually going to cook with it. Here are your main options:
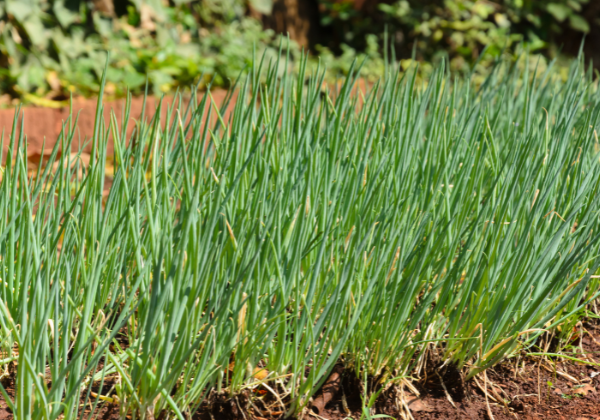
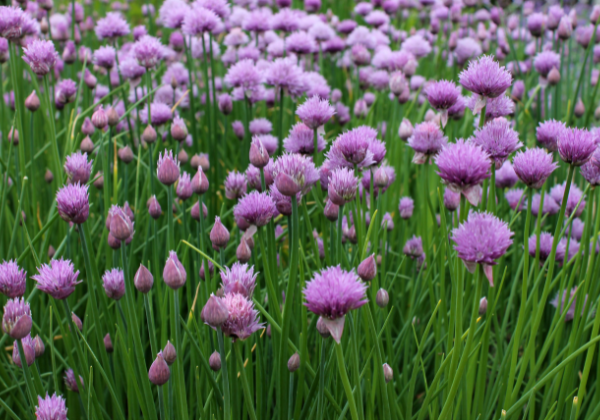
- Common Chives (Allium schoenoprasum): Known for their mild onion flavor, these are the traditional chives most gardeners grow. Their hollow, grass-like leaves are perfect for snipping into salads, soups, and more. This variety has more of a pink blossom. Here’s a link to where I purchase my seeds from Botanical Interests – Common Chive Seeds
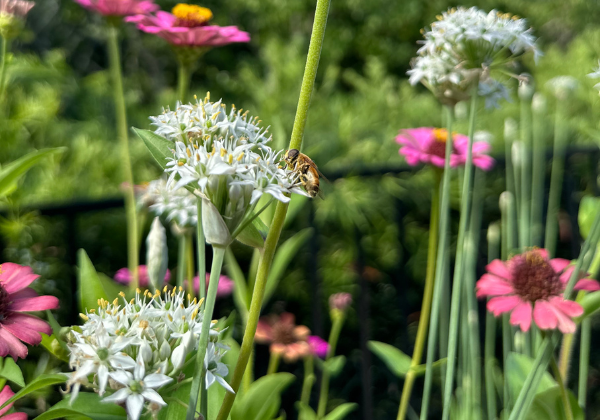
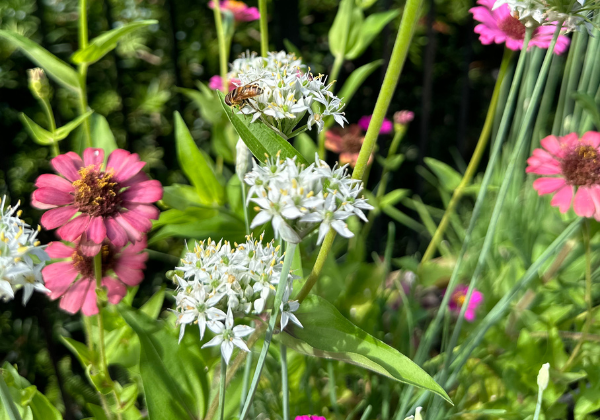
- Garlic Chives (Allium tuberosum): Also known as Chinese chives, these have a flat leaf and a more garlicky flavor. They make a great addition to stir-fries and Asian-inspired dishes, offering a subtle garlic hint without overpowering other ingredients. This variety is probably my personal favorite. Here’s a link to where I purchase my seeds from Botanical Interests – Garlic Chive Seeds
- Siberian Chives (Allium nutans): These have broader leaves and a unique flavor that combines onion and garlic notes. They are hardier than other varieties, making them an excellent choice for colder climates.
When selecting chives for your garden, consider what flavors you prefer and how you plan to use them in your cooking. Each variety has its own distinctive taste and growth characteristics, so think about what aligns best with your gardening conditions and culinary aspirations.
Preparing to Plant Chives
To ensure your chives thrive in your garden, adequate preparation before planting is essential. Here are some steps to follow:
- Chives grow best in partial shade and well-drained soil. To improve the soil’s fertility and drainage, start by enhancing it with compost or coarse sand. I usually also incorporate worm casings into my soil.
- The ideal time to plant chives is in early spring, about 4 to 6 weeks before the last frost.
- Spacing is also important; plant chives 8 to 12 inches apart to give them enough room to grow. However, due to my limited area of growth, I tend to ignore such generous spacing. If things get too crowded, I separate as needed.
Following these steps ensures your chives have the best chance of thriving in your garden.
Choosing the right location and preparing the soil appropriately are key to achieving optimal results. These steps will set the foundation for healthy, productive chive plants. Next, we’ll examine choosing the perfect spot and enriching the soil to enhance chive growth.
Choosing the Right Location
Location matters, but chives are pretty forgiving about it. Full sun is ideal, but if you’re gardening somewhere the summer sun tries to actively murder your plants (hi, Florida), a little afternoon shade will keep your chives happier. Just aim for fertile, well-drained soil and you’re most of the way there.
If you’re growing chives in a container, place them on a sunny windowsill or a spot in your garden that receives ample sunlight. Proper light is key to vigorous growth and abundant leaf production.
Soil Preparation
Soil preparation is a vital step in the process of chive cultivation. Here are some steps to follow:
- Start by mixing several inches of aged compost or rich organic matter into the soil to boost nutrients and improve drainage.I also incorporate worm casings into my soil when planting edible plants.
- Chives prefer well-drained, loamy, sandy soil with a pH of 6.5 to 7.5.
- Ensuring the soil is well-draining and rich in organic matter will help keep the soil moist but not soggy, which is crucial for healthy chive plants.
Adding homemade compost or compost tea can provide the necessary nutrients for your chive plants. In early spring, a side dressing of compost will ensure your plants have all the nutrients they need to start the growing season strong.
Planting Chives
You’ve got two paths here: seeds or transplants. Spring is the classic planting window, though down here in Florida, fall works just as well (one of the few perks of not having a real winter). If starting from seed sounds like a commitment you’re not ready for, just grab a young plant from the nursery or beg a clump off a gardening friend — nobody will judge you, I promise.
Both methods have their advantages. Starting from seeds allows you to nurture your plants from the beginning while transplanting young plants or dividing clumps can offer quicker results. Let’s delve into the details of both methods.
Starting from Seed
Starting chives from seed involves a few steps but can be very rewarding. Here’s how to do it:
- Sow chive seeds indoors in early spring, about 6 to 8 weeks before the final frost date.
- Use small pots or modular trays filled with seed compost or seed starting mix.
- Sow the seeds thinly and cover them with a thin layer of vermiculite.
- After watering the pots, gently place them in a heated propagator or cover them with a clear plastic bag to help with germination. This will create a warm and humid environment that encourages the seeds to sprout.
Once the seedlings appear, move them to a warm, bright location to grow. During the springtime, you can sow chive seeds directly outdoors into prepared ground or large containers filled with multi-purpose compost. This will give you a good start for growing fresh chives. Space chive plants 12 to 18 inches apart to ensure good air circulation and help prevent powdery mildew.
Learn about my favorite tools for seed starting here.
Transplanting Young Plants
Transplanting young chive plants is a straightforward process. Here’s how to do it:
- Once your seed-raised chive plants are about 10cm (4 inches) tall, harden them off for a couple of weeks before transplanting them outdoors.
- Large potted chive plants can often be divided into several smaller clumps before planting.
- Space the clumps at least 15cm (6 inches) apart to give them enough room to grow.
Replant these new clumps in soil enriched with organic matter, such as fine compost, to support their growth. This method ensures a healthy start for your chive plants and can lead to a more robust harvest.
Caring for Chive Plants
Here’s the best part about chives: once they’re established, they basically take care of themselves. They’re cold-hardy perennials, so they’ll keep coming back on their own — you just need to keep up with watering, the occasional light feeding, and dividing the clump every few years so it doesn’t take over the whole bed.
Watering and Mulching
Watering plays a fundamental role in the growth of chives. Here are some tips for watering your chives:
- Check the soil weekly and water when the top inch or two becomes dry.
- Deep watering ensures the soil around the root zone does not dry out, especially when rainfall is insufficient.
- Applying a light mulch of ground-up leaves, compost, or grass clippings helps retain moisture in the soil and keeps the plants hydrated.
Regular watering, combined with proper mulching, creates an ideal environment for chives to flourish.
Fertilizing
Chives should only be fertilized sparingly. Over-fertilizing can lead to slower growth but stronger flavors and healthier plants. A light application of a 5-10-5 fertilizer once each spring is sufficient if the plant weakens from continuous harvesting. Adding fresh compost or worm castings every quarter provides the necessary nutrients to the soil.
For chives grown in containers, use a liquid fertilizer at half the label-recommended strength every four to six weeks to support their growth.
Weeding and Pest Control
Maintaining a weed and pest-free chive garden is vital for its healthy growth. Dispose of plant debris at the end of cropping to reduce infection risk. Maintaining good hygiene in your chive garden prevents infections that can hinder plant growth and leaf production.
Regularly weeding and monitoring for pests ensures your chives remain healthy and productive throughout the growing season.
Harvesting Chives
Once your chives hit about 6 inches, it’s snip time. And here’s the fun part: the more you harvest, the more they grow back — so this is one herb where you genuinely can’t overdo it (within reason). Morning is best, when the leaves are at their juiciest. Grab your scissors, cut about 2 inches from the ground, and take only what you’ll actually use that week.
Chives can be harvested as often as once a month, but avoid cutting back more than one-third of the plant at any time. This allows the plant to recover and ensures a continuous supply of fresh leaves.
Chives’ flavor is best when they’re freshly cut, so try to harvest them right before you plan to use them. This will provide the most robust flavor and nutritional value for your dishes.
Harvesting Flower Buds
Chive flower buds are not just beautiful; they are also edible. Cut flower stalks at the soil line after blooming to keep the chive plant productive. Chive flowers can be used in various ways:
- As a garnish
- Tossed into salads for a burst of color and mild onion flavor
- To make chive blossom vinegar for salad dressing
- As a garnish for various dishes
Harvesting flower buds adds another dimension to your culinary creations, making your dishes both visually appealing and flavorful.
Storing and Using Fresh Chives
My go-to storage method is treating chives like cut flowers: a glass of water in the fridge, and they’ll stay fresh for over a week. If you’d rather do the classic damp-paper-towel-in-a-bag trick, that works great too — just wash and dry them first either way.
Fresh chives should be used quickly to retain flavor, ideally within a week. Consider freezing chopped chives in ice cube trays with a little water or oil for longer-term storage. This way, you can easily pop out a cube whenever you need to add chives to a dish.
Culinary Uses
In the kitchen, chives are the herb equivalent of a good pair of jeans — they go with almost everything. Scrambled eggs, baked potatoes, a quick vinaigrette, a bowl of soup that needs a little something: chop some chives, toss them in, instantly better. The blossoms even make a gorgeous infused vinegar if you want to get fancy.
Experiment with different dishes to discover how chives can elevate your cooking. Their mild yet distinct flavor pairs well with a wide variety of ingredients.
Using Chinese chives in your cooking adds flavor and a touch of elegance to your dishes.
Companion Planting with Chives
Planting chives alongside other plants can offer numerous benefits to your garden. Chives:
- Are deer-resistant
- Can repel flies, mosquitoes, and aphids, making them effective for pest control
- Deter pests like Japanese beetles, slugs, aphids, and cabbage worms, which can be highly beneficial for protecting other plants
- Planting garlic chives near grapes can help deter aphids.
Chives are excellent companions for a variety of vegetables, including:
- carrots
- celery
- lettuce
- peas
- tomatoes
However, avoid planting them near asparagus, peas, spinach, and beans, as they compete for similar soil nutrients. Incorporating chives into your herb garden not only enhances the flavor and growth of your companion plants but also helps maintain a healthier garden ecosystem.
Troubleshooting Common Problems
Despite their hardiness, chives can sometimes face issues like fungal diseases. One common problem is leek rust, a fungal disease caused by Puccinia porri, which leads to bright orange pustules on chive leaves. This disease typically affects chives from mid-summer to late autumn. Unfortunately, there are no fungicides approved for amateur gardeners to control leek rust.
The most effective approach to dealing with such issues is to focus on prevention. Here are some steps you can take:
- Ensure good air circulation
- Avoid overhead watering
- Dispose of any infected plant material promptly
- Regularly monitor your chive plants
- Maintain garden hygiene to minimize the risk of diseases and keep your plants healthy.
Grow Chives in Your Garden
Chives really might be the easiest win in your whole garden — low effort, comes back every year, and makes almost everything you cook taste a little more like you did it on purpose. Follow these tips and you’ll have more chives than you know what to do with by summer.
So tell me — are you growing common chives, garlic chives, or both? And what’s the first dish you’re topping with them once they’re ready to harvest? I’m always looking for new ways to use mine, so drop your favorite in the comments.
Happy Gardening!